Showing posts with label blog. Show all posts

Sunday, 15 January 2017

How to Get Out of a "Creative Rut"

Hello Everyone!!!
 
I had a gallery visit planned for today's post (which I still will post, don't worry) but this post felt more natural to write today so here goes...
 
Have you ever been stuck in a rut? Be it creative or just life in general? Because that's how I feel right now. And as this blog is a place were we can hopefully learn and grow creatively from each other, I thought this might be the place to hopefully help you with tips to get out of the rut if you feel the same way.
 
Here are some really fast hand drawings I did yesterday. If you think you have nothing to draw what's in front of you!
 
I don't know about you but I feel like sometimes when we have a hobby, passion or career that we love and it feels so much worse when something goes wrong. I suppose this shows how much we care.
 
Sometimes when there is too much thrown at me or a project is too exciting I get completely overwhelmed and just pause.

Do you know what I mean? And then it feels like the longer you pause the more effort it will take to start the project again. This my friends is what I call a "Creative Rut".
 
Make your creative space helpful to you. I stuck inspirational quotes on my wall.
I am no professional (unless you're taking about a professional procrastinator) but I would say, you have two options: 1. sit around watching random Youtube videos all day until you finally look up and your eyes feel square and you realise you have done nothing with your life or 2. kick some butt (metaphorically, please don't kick any real butts)! Get out of that rut and produce a body of work that you will feel so proud of!!
 
Hmmmmm... well to me it's a no brainer, the second option is the one for me! So then why do I keep finding myself having square eyes and an empty sketchbook??
 
When I hear people talk about their passions I find it so beautiful! To think that someone works constantly, and never has a reason to stop because they love it so much, is absolutely awesome! I used to feel like I was one of those people but ever since I've been going to college and applying for Uni, I suddenly feel so small.
 
Don't get me wrong I absolutely love college and really feel like my mind has been opened and maybe this "Creative Rut" feeling is a perfectly normal side effect.
If you're tired of drawing, use your hands!! Start making in 3D, I guarantee it will help you see from a different perspective!
 
I think the main thing of a "Creative Rut" is the feeling of being completely overwhelmed. I keep hearing all these amazing stories of how people make their creative practise their everyday life and never separate the two. So then when I don't quite feel in the mood to draw, I suddenly feel so inadequate.
 
But you see I am human at the end of the day, I'm not a machine.
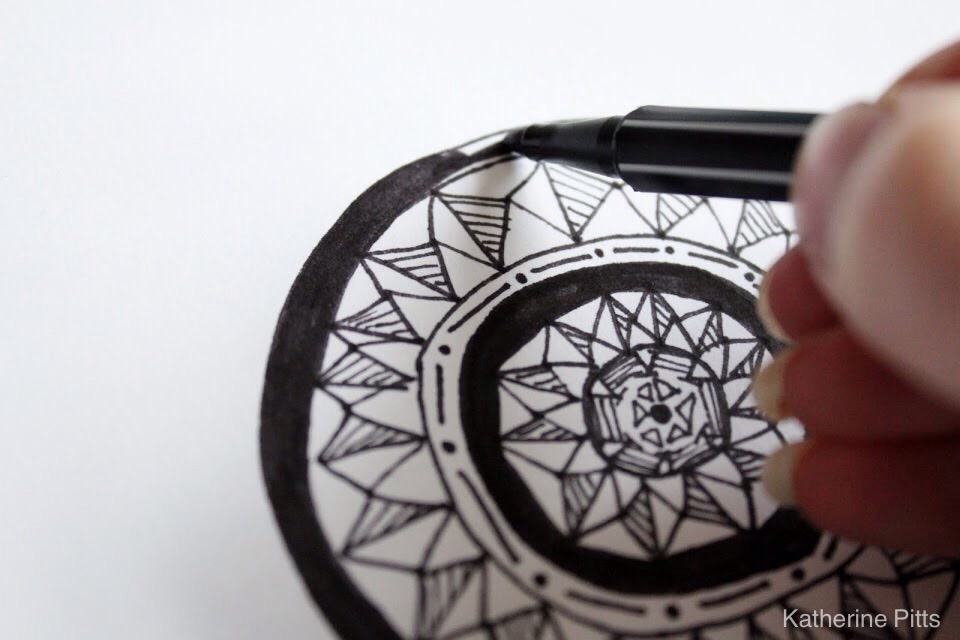
Step out of your comfort zone! Rethink what drawing is for you. Try drawing sound or how you feel in your mind instead of a physical object.
 
Rethink painting! This is when I got frustrated with my painting so I dipped tape in paint and covered a page in it. Now I suppose you could say its a representation of my frustration at the time haha! (There is no right or wrong with paint do what you enjoy!)

So! I don't want to be in a "Creative Rut", I'm sure we all don't, so how are we going to fix it?!
  1. Turn off the screens (not yet if you want to finished reading this post first haha!). If you're procrastinating in anyway try and break the habit. Believe me I know that feeling but one step at a time will help you.
  2. Get your camera out and take a photo (of anything, you don't even have to move, not yet anyway) I find that a camera can be a frame to help you see the beauty in something. Also flicking through old shoots you have done will help remind you of your creativity!(If you don't have a camera draw quickly or just look around for a bit and be inspired.
  3. BELIEVE IN YOURSELF!!! It sounds so rediculously cheesy I know but it's true! Remember how strong and creative you are! YOU CAN DO THIS!!
  4. Don't compare yourself to others! Now I love appreciating other people's work, I think talent is a truly beautiful thing but don't put yourself down for it. There is no such thing as perfection, it's just something we construct in our heads, so we will never reach it. Just look after youself and you'll find the creative you will be back in no time
  5. It's up to you. If you still feel stuck then its completely up to you to turn it around. Find an outlet for you, whack paint on paper, draw with your eyes closed, hit a piano and see what sounds you make! It's up to you at the end of the day to change how you feel.
Get out there!! Tell a friend or family member that you're stuck and go see an exhibition together. Different points of view can really open your minds. 
When I was flicking through my camera I saw the last few photos I had taken. They were pretty cool and I hadn't done anything with them. It made me realise that when I feel inadequate next to these amazing people that make art everyday, it is not because I don't make art everyday but that I don't show it!

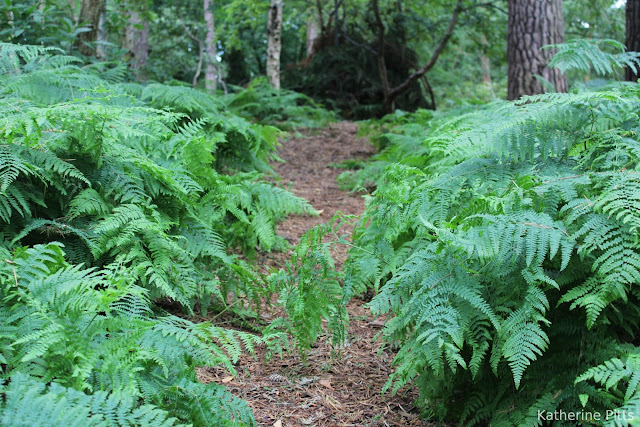
Here's a photo I took ages ago, I really like it but I've never shown anyone.
 
So I suppose what I'm trying to say (and if you're still reading this then you are the best!) is just GO FOR IT!!
 
Be fearless! Put yourself out there! YOU ARE AWESOME!
 
The world is a beautiful place so get out there and make the most of it!! Here's a photo I took on a little Paris adventure!
 
So there you go! I hope that has helped you if you feel a little less stuck in a "Creative Rut". And if you still feel stuck, well at least you know you're not alone!
 
I wish you all the happiness in the world!
Hope you have a great day!!


Thursday, 15 December 2016

Guess Who's Back?!


Hello Everyone!!
 
I'm sure you've guessed from the title and the fact that I've posted this that BLANK KANVAS IS BACK!
 
I took this on my Canon DSLR 1200D at Sky Gardens in London. This was a great photography day out! I'll blog about it to show more photos and I am definitely going back!!

I had to put the blog on hold while I sorted my life out, haha! But all is going well! I worked hard and passed my A levels with an A in Art (Wahoo!). I also had to apply to art college. After working on my portfolio and going to many interviews, I was accepted into University of the Arts London and I am now studying an Art and Design Foundation Diploma at Camberwell College of Arts. (Wow all of that sounds so official - in a nutshell I now go to art college).
 
So, there is a lot to catch up on and its all very exciting!
 
I thought for todays post I'd like to reintroduce myself  because it has been so long and I feel like it will be nice to start again. So here goes......
 
Hello everyone, My name is Katherine and I am the writer and creator of the blog Blank Kanvas. I am an art college student and I have recently specialised in 3D Design: Theatre, Screen and Performance. Art is my life and I know it sounds cheesy but it is very true! Look around you, everything has been designed, everything is art. Isn't that exciting?!
 
Here is an outdoor installation I created in A level. With everything going on I never got a chance to blog about it. Better late that never right?!

Don't worry I'm not going to change the existing format of the blog too much but I have got so many new ideas!
 
Here's a little taster of what's to come!.. 
  • My First week at art college
This is my favourite photo I took of a sculpture we created in the first week of art college. Can't wait to blog about this!
  • Explaining the different pathways in art
As brilliant as Painting and drawing are there is a huge world of art out there. This is a section of a 3D piece I worked on a few weeks ago.
  • DIY room decoration
  • Gallery visits (because you can never have enough!) and I'm hoping to collaborate with other bloggers! 
I have been going to so many galleries so I have a lot to tell you about! In this photo is the lovely Isabel (aka Izzie the illustrator) She is absolutely brilliant and we have so many plans for collaborations, so watch this space! (I'll put a link to her blog at the end)
  • Photography days out
  • Experimenting with new and different materials in art
Here is a little experiment using textures.
 
One of my favourite weeks at college. We made the wall in to our sketchbook, anything we made went on the wall. I loved this project and will definitely blog about it soon!
  • Experimenting with baking and cooking (I'm not a pro but this way, I can make the mistakes so you can keep your kitchen clean when you have a go! haha!)
  • Drawing in public
  • Life drawing
Sorry about the nudity (you can scroll past if you want haha) this is a few 10 minute paintings I did in a life drawing course.  Life drawing is a brilliant way to improve your observational drawing skill, once you get past the naked people fact... 
  • Explaining my specialism
This is the first ever maquette I made in my specialism of design for stage and screen. I am hoping to one day go into model making. This project was all about developing characters. I learnt so much and will definitely pass on my knowledge to you in a blog post!
  • Looking back at old A Level work (advice)
Here one of the pages from my old A level sketchbook. Oooo it will be wired looking back and seeing how far I've come!
  • AND SO MUCH MORE!!!!
So there you go! I'm back in action!
 
If you are reading this now then thank you so much for sticking with me! The future is very exciting and I can't wait to share all this creativity with you!
 
As always Blank Kanvas has been about inspiring creativity between all of us. I'm still only learning and so we can go on this creative adventure together!!
 
Here's a link to the wonderful Isabel's blog https://izzietheillustrator.wordpress.com/
 
Thanks again!
I hope you have an absolutely brilliant day!


Friday, 9 October 2015

Nature Photography!

Hello everyone!
 
The other day I went to my favourite park to take some nature photography with my professional Camera (Canon EOS 1200D).
 
I was pleased with how some of the photos came out and wanted to share them with you to hopefully inspire you!

I used manual focus on the flower in the foreground. I was so lucky to be able to focus on the bee in the flower (I also used zoom because I didn't want to get to close to the bee, haha!)
I used close up settings on my camera, manual and auto focusing and I really tried to think about composition when taking the pictures.
 
I enjoy photography so much! it is just a hobby for me so if you have any tips or tricks please share in the comment and we can all inspire each other!
 
Feel free to dip in and out of this post. I hope you enjoy viewing it as much as I enjoyed making it!
 
 
Close ups and zoom
 
I was able to use a zoom lens for these photos which was very exciting!
 

I had to stay really quiet when taking this but I managed to take a close up photo of this amazing butterfly. I think butterflies are so beautiful!

I used a zoom lens, for the first time, to take this. I was so amazed at how far it could go and still keep an amazing quality image. I recommend a zoom lens!
There was a vast amount of these tiny flowers so I tried to get a close up to show their beauty. I also used focus to emphasise the flowers even more.
Landscapes of the woods

In the park there is an amazing woods that seems to go on forever! I couldn't leave the park without going in and taking photos! Here are some of the photos I took in the woods.


I would love to get a wide angle lens and try this shot again, I think it could look much better!


Theses stairs are my favourite part of the woods! It looks so magical!!


I took this low down on the ground behind a tree stump. I focused in on the background and I'm pleased with how I have captured the light hitting the leaves.

Double exposure/editing
 
I used an app called Pixlr Express to edit my photos. I do not have Photoshop and I've found that this free app it a good replacement (considering it is free).
 
I have used Photoshop at school and I think it really is amazing! I hoping to do a blog post on Photoshop soon!

I edited this photo on Pixlr Express. I used double exposure to contrast a photo of wood grain to bold flowers.

I edited this on Pixlr Express and used double exposure. I also made the flowers appear more florescent to contrast against the bark of the wood.

 
Focusing on a varying composition
 
It can be quite difficult to pick out what to focus on in a busy composition, like a bed of flowers. I keep practising and I think these have turned out quite well!


So there we go!
 
I hope you have enjoyed this post! Please let me know of any ways I can improve because I'm only learning and it would be wonderful if we could share our creativity and inspire each other!
 
Thank you so much for reading! Please feel free to check out my other posts and join this creative adventure by following to be told when I make a new post.
 
Thanks again, have a brilliant day, and don't forget to be creative!


Saturday, 3 October 2015

Doodle in Progress

Hello everyone!
 
Recently I've noticed a lot of people doing these really cool doodles in really detailed circles! I think they are amazing and I've see so many on Instagram that it inspired me to try for myself.

 
I haven't got the specialist tools and skills but I have got a thin and thick pen and the love of doodling so I thought... why not!?!
 
This is just a quick little post (mainly photos) I hope you enjoy and possibly be inspired to grab a pen and doodle! It doesn't have to be perfect (mine sure isn't) but as long as you enjoy it, that's all that matters.
 

I used a fine 0,4 pen for the smaller, detailed parts.


I've seen a lot of people use special tools, like a compass, to make a perfect circle (which looks amazing!) but I wanted to practise my precision, so I tried out free hand circles. I know it's not perfect but if I keep practising then hopefully I'll get better!


I also used a thicker felt tip pen for any parts with block colour.


I also tried to be fancy with my camera angles! Haha!


I tried to overlap circles to make the doodle look more 3D.


This is a section of it.

I'm hoping to fill the whole A3 page with this doodle! Once I've filled the page I was going to scan it and try out washing different colours over it.

I hope you enjoyed this post, when I've finished the whole page I'll do another post to show the finished product!

I also hope that this has inspired you to get creative, pick up a pen and doodle! I doodle all the time in the margins of my books but this was my first time drawing the circle doodles.
 
If you have a go then please feel free to send them to me on Google + https://plus.google.com/u/0/+KatherinePittsBlankKanvas/posts or my Instagram https://instagram.com/_.kxtherine._/ 
I would absolutely love to see your versions!

Feel free to check out the rest of the blog, get inspired and share your creative thoughts!

Thanks for reading, I hope you have a great day and enjoy getting creative!


Sunday, 20 September 2015

DIY Tie-Dye!

Hello everyone!
 
I enjoyed making this post so much! It took me a bit longer than usual but I didn't want to rush it.
 
Today's post is all about tie-dye!! I had a lot of fun doing this and I really recommend trying it out.
 
 
Before now, I had never properly tie-dyed anything, so I think for a first attempt it worked out quite well!
 
For this post I will go through step by step on what I did and if you have any further tips then please let me know in the comments and we can shared our ideas!
 
Also if you decide to try out some tie-dye then please share your creations with me on my Google + (link is in the side bar) I would love to see what you've done!
 
So Lets get to it...
 
First of all I set out my tie-dye area, I did mine outside because it saved the risked of staining the floors and it was such a lovely day!
 
This is what I used to tie-dye. You can buy this in many craft shops and there is usually a variety of colours to choose from. I got mine form 'Hobby Craft'.


Above shows the equipment I used to help me tie-dye. I used a small plastic box and a cupcake cooling tray to create my tie-dye station (this worked just as well as a professional tie-dying station!).
 
You will also need:
  • Your desired items to tie-dye (preferably 100% cotton) (I used two t-shirts, a vest top, and four  small squares of cotton sheets)
  • Your chosen tie-dye colour/colours
  • rubber bands
  • plastic gloves (the dye stains a lot! Trust me, I learnt the hard way!)
  • Wear old clothes that you don't care about getting covered in dye
  • Cling film or air tight plastic bags (you will have to put your tie-dyed item into this for the dye to saturate over night)
  • Possibly scissors to cut the rubber bands off at the end
  • Somewhere to rinse the tie-dyed items with water
  • A washing machine (or you could hand wash)
  • A small amount of detergent
The dyes I used came with instructions to help. There is coloured powder in the bottle and all you need to do is fill the bottle with water to the line at the top and then shake the bottle well until all the dye is mixed up. For a weaker colour you simply add more water and have less powder.
 
Fire Tie-Dye

I was super excited to try out this fire tie-dye! I was inspired my this YouTube tutorial  https://www.youtube.com/watch?v=NafkWOJIWyY and I wanted to see if I could do it too.
 
This tie-dye uses no rubber bands, all you do is roll your chosen item up (in my case it was a vest top) and then tie it in a knot. The tutorial I linked above shows how to do this. Make sure the item you are tie-dying is damp.
 
The colours you will need are:
  • red
  • orange
  • yellow
  • black
(When I was buying the dyes I couldn't find any orange but I improvised by just using red, yellow, and black and I think it still looked pretty great in the end!)

Here are the colours I used.


First Dye the centre in yellow and work outwards. Don't be afraid to put loads on, the more the merrier I say!

I then covered the edges in red and tried to go over some of the yellow to make up for the fact I didn't have an orange. If you have orange you can put this on before putting on the red.

Now, this bit I was scared I was going to ruin the whole thing but don't worry, if you've saturated the other colours enough the black shouldn't ruin it. Cover the whole thing in black dye. The black is what makes the tie-dye look like a burning fire!

Don't forget to do the other side as you go.

When you have finished, cover the whole thing in cling film or put it into a plastic bag and leave this over night. The instructions said to leave it for 6-8 hours and the longer you leave it the stronger the colours will be.
Spiral Tie-Dye
 
I think this design is a classic for tie-dye! I was inspired for this design by this You Tube video https://www.youtube.com/watch?v=abjpy72Sf6U
 
You can use any and as many colours you like for this design! Be free and get creative!!

I used a damp, white, 100% cotton t-shirt and stared a spiral by pinching the fabric and turning in the same place. Where you start the swirl on your t-shirt will be the centre of your swirl. I did mine in the middle of my t-shirt. You can also use a fork to do this if it is easier.

When you have finished swirling, it should look something like this.

I then added rubber bands and made sure they all crossed in the centre of the spiral. I think I used about 8 rubber bands. You can use as many or as little as you like. The more rubber bands you use the more white spaces there will be.

I used the colours fuchsia and turquoise.

I tried to stay in the lines of the rubber bands but the dye did spread. If you wanted to reduce this you could blot the excess die off with a cloth.

I alternated the two dyes in each section. The colours bled into each other and made this beautiful purple!


When I was done I had to take a few photos! I just thought it looked so pretty! Haha!

Then wrap this in cling film or put it into a plastic bag over night or 6-8 hours. The longer you leave it the deeper the colour will be.
Crumple Tie-Dye

For this tie-dye effect I also wanted to try dyeing a shirt that already had something printed on to it. The dye will not take to the printed area and I think that this makes the shirt look like I bought it like that. Haha, but no, now it is customized and is the only shirt in the world like it! Yaay!
 
For this Crumpled tie-dye effect I just decided to experiment a little. You don't have to use rubber bands for this effect but I did because I wanted more blank spaces in the design.
 

Make sure the shirt is damp and then randomly crumple up the shirt. It doesn't matter where you start on the shirt.

It will look something like this when you are done.

I then decided to cover the crumpled shirt in many rubber bands but you can skip this step if you want to.

Like I said I covered it in many (and I mean many) rubber bands!

I then randomly used all of my dye colours (red, turquoise, fuchsia, yellow and black) and shook the dye all over (don't forget to turn it over and do the other side).


I thought it looked really pretty with all the colours!
Then wrap this in cling film or put in a plastic bag and leave over night or for 6-8 hours. The longer you leave it, the bolder the colours will be.
 
Other Designs

You can also try out some different, amazing tie-dye designs.

I recommend this You Tube channel I found, that really inspired me to try tie-dye for myself https://www.youtube.com/user/hobblephosk

This is a design inspired by the shape of an eye. I tried this out on a square sheet of 100% cotton.
 Arty photos!
 
While I left the tie-dyed items to work their magic over night, I thought that the droplets of colour on the grid and box looked so pretty I had to take photos!
 
The camera I used is a Canon EOS 1200D DSLR. If you want to know more about it, feel free to check out my blog post on my first professional camera http://blank-kanvas.blogspot.co.uk/2015/08/my-first-professional-camera.html
 
You can scroll past this, if you're not bothered, to where I talk about rinsing and washing the tie-dye.
 
Hopefully this will inspire you to do some photography while you are waiting for the tie-dye! Let me know what you think!


I love the vibrancy of the colours! I did this using the close up setting on my camera.


Here I focused on the inside of the box.


This is the droplets against the side of the plastic box.


I took a photo behind the box, of the light through the trees. I thought this looked quite abstract and interesting. 


I thought this looked quite intense considering it's just a plastic box with droplets of dye in it!

Rinsing and washing
 
Once you have left your tie-dyed items for 6-8 hours or more (or overnight like me) then it's time to take them out and rinse them.
 
I rinsed mine in the bath but be careful because the dye will stain. However, I found that if I cleaned up straight away the stain went.
 
Rinse out your tie-dyed items until the water is almost clear.


This is rinsing out the fire tie-dye.

The more dye you use the longer it will take to rinse out.
Once you have rinsed out your tie-dyed items, squeeze out as much water from them as you can and then put them in the washing machine with a small amount of detergent.
 
I washed my t-shirts separately because it was my first time and I wasn't sure about colours running but I have heard that it is ok to put them all in together. Do what you feel comfortable with.
 
You can then iron them if you want to lock in the colour.

The finished product!

On the far left if the crumpled tie-dye on a printed shirt, in the middle is the fire tie-dye with no rubber bands, and on the far right is the classic spiral tie-dye.
I am so pleased with how these turned out! Especially as this was my first attempt at tie-dye!

Here are some of the other tie-dye designs I tried on small square sheets of 100% cotton.
So there you go! I hope you enjoyed this DIY tie-dye post as much as I did making it!
 
Thank you so much for reading! It means so much to me, you are the best!
 
If you have any questions or further ideas then please feel free to share them in the comments below and we can inspire each other!
 
Also if you make any tie-dye then please share it with me on my Google + https://plus.google.com/u/0/+KatherinePittsBlankKanvas/posts
 
Feel free to follow this creative adventure be told when I make a new post and check out my previous blog posts to hopefully be inspired to get creative!
 
Thank you so much for reading! Have a brilliant day!