Showing posts with label editing. Show all posts

Friday, 9 October 2015

Nature Photography!

Hello everyone!
 
The other day I went to my favourite park to take some nature photography with my professional Camera (Canon EOS 1200D).
 
I was pleased with how some of the photos came out and wanted to share them with you to hopefully inspire you!

I used manual focus on the flower in the foreground. I was so lucky to be able to focus on the bee in the flower (I also used zoom because I didn't want to get to close to the bee, haha!)
I used close up settings on my camera, manual and auto focusing and I really tried to think about composition when taking the pictures.
 
I enjoy photography so much! it is just a hobby for me so if you have any tips or tricks please share in the comment and we can all inspire each other!
 
Feel free to dip in and out of this post. I hope you enjoy viewing it as much as I enjoyed making it!
 
 
Close ups and zoom
 
I was able to use a zoom lens for these photos which was very exciting!
 

I had to stay really quiet when taking this but I managed to take a close up photo of this amazing butterfly. I think butterflies are so beautiful!

I used a zoom lens, for the first time, to take this. I was so amazed at how far it could go and still keep an amazing quality image. I recommend a zoom lens!
There was a vast amount of these tiny flowers so I tried to get a close up to show their beauty. I also used focus to emphasise the flowers even more.
Landscapes of the woods

In the park there is an amazing woods that seems to go on forever! I couldn't leave the park without going in and taking photos! Here are some of the photos I took in the woods.

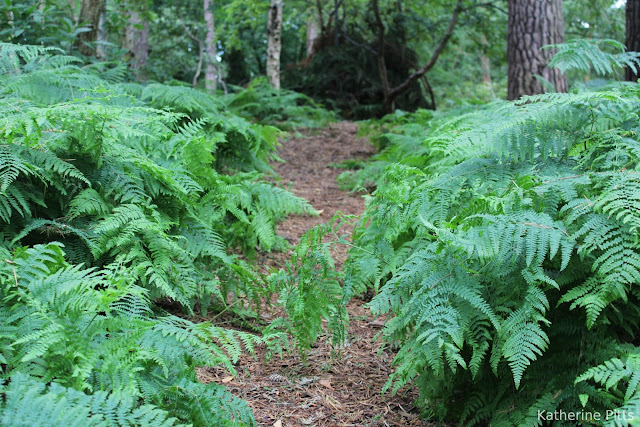


I would love to get a wide angle lens and try this shot again, I think it could look much better!


Theses stairs are my favourite part of the woods! It looks so magical!!


I took this low down on the ground behind a tree stump. I focused in on the background and I'm pleased with how I have captured the light hitting the leaves.

Double exposure/editing
 
I used an app called Pixlr Express to edit my photos. I do not have Photoshop and I've found that this free app it a good replacement (considering it is free).
 
I have used Photoshop at school and I think it really is amazing! I hoping to do a blog post on Photoshop soon!

I edited this photo on Pixlr Express. I used double exposure to contrast a photo of wood grain to bold flowers.

I edited this on Pixlr Express and used double exposure. I also made the flowers appear more florescent to contrast against the bark of the wood.

 
Focusing on a varying composition
 
It can be quite difficult to pick out what to focus on in a busy composition, like a bed of flowers. I keep practising and I think these have turned out quite well!


So there we go!
 
I hope you have enjoyed this post! Please let me know of any ways I can improve because I'm only learning and it would be wonderful if we could share our creativity and inspire each other!
 
Thank you so much for reading! Please feel free to check out my other posts and join this creative adventure by following to be told when I make a new post.
 
Thanks again, have a brilliant day, and don't forget to be creative!


Sunday, 23 August 2015

My First Professional Camera!

Hello Everyone!

I am super excited to tell you that I finally have a professional camera! I'm so excited!!

The official name of the camera is Canon EOS 1200D DSLR. It is quite a popular camera and is recommended for beginners, so this was ideal for me!
 
I have always loved photography! I love all parts of it; from old family photos, all the way to art being expressed through the medium of photography. It is just wonderful to think that moments in time can be captured and the image can be kept forever. From a very young age, I have loved photography, I remember using my mum's terrible phone camera (that was so amazing at the time by the way) and taking close up pictures of fabric and walls for different textures (yes, I know, I was a weird kid).

This is a close up photo I took on the new camera. I think this shows what amazing quality the camera is in focusing on the details of the fabric.
 Fancy photography for me, up until getting my camera, was taking photos on my iPhone 4S and then editing them with an app. Haha! But now I can be super fancy and take super high quality 18 mega pixel photos!

I just got a bit creative here. I put a candle behind a glass of water and this really helped to highlight the tiny bubbles in the water.
 Some of the photos in my last blog post were taken with my new camera, when I was testing it out. If you haven't seen that post yet, feel free to check it out, its called Experimenting with Mark Making.

I've already taken thousand of photos on the new camera and I'm trying to learn different techniques to really advance my photography knowledge and skill! I have been trying out different shutter speeds, close up settings, temperature and aperture settings, etc. I like to think of it as editing a photo before the photo has been taken.
 
Shutter Speed with Zoom
I took this using the low shutter speed and zoom technique at the Saatchi gallery
My Brilliant friend Laura is an A Level photography student (she is amazing!). Laura showed me this cool technique using low shutter speed and the zoom lens. All you do is lower the shutter speed to around 0"5. When you take the picture, during the shutter closing, move the zoom lens in and/or out. This then makes the image seem as if it is coming at you or moving away. A similar effect can be made by moving the camera sided to sided or left to right when taking the picture on a shutter speed of around 0"5.
 
So thank you Laura for teaching me this, I do it all the time now!
 
If you want to see Laura's amazing photography and art work check out her brilliant instagram @lauradeasyart https://instagram.com/lauradeasyart/ 
 
This is a photo I took using the low shutter speed and zoom technique at the Saatchi gallery. I will definitely blog about the Saatchi gallery!
 
This is of a lantern using the same technique.
Remember the lower the shutter speed, the lighter the image will be because more light is being let in. Therefore, the higher the shutter speed, the darker the image will be because less light is being allowed to pass through.
 
Low Shutter Speed with Movement
 
This effect was created using a low shutter speed. The shutter speed was set to 0"4, therefore, it was able to capture more of the tube passing at a speed, this creates this super amazing effect.
 
I recommend doing this it was so much fun!


Light and Shadow
 
I used the natural light of windows to create light and shadow. I thought this created quite an intense, warm atmosphere in the photos.


Close ups (fur)
 
Here I did a little photo shoot with my wonderful little rabbit, Teddy. He was a brilliant little model and loved the camera!
 
I did this to test out the clarity of the camera. I think the photos turned out really well and clearly captured a lot of detail in the fur.


Daylight
 
The intensity of the colours in daylight is really effective. I played around with different settings in the creative mode to really define and draw out different colours.


Focus
 
I also practised focusing on different parts of the picture to exaggerate specific details.
 
(By the way, this burger was delicious!)
There we go! I Hope that this was useful to any of you first time photographers like me, or those who are thinking about getting a camera (I really recommend the Canon EOS 1200D DSLR for first timers).
 
 
Be sure to check out Laura's instagram @lauradeasyart https://instagram.com/lauradeasyart/  and while you're there, feel free to check out my instagram @_.kxtherine._ https://instagram.com/_.kxtherine._/ 
 
If you have any other helpful tips for photography then please share your knowledge in the comments and we can all inspire each other in this creative adventure!
 
Thanks for reading, enjoy getting creative and have a great day!