Hello everyone!
I enjoyed making this post so much! It took me a bit longer than usual but I didn't want to rush it.
Today's post is all about tie-dye!! I had a lot of fun doing this and I really recommend trying it out.
Before now, I had never properly tie-dyed anything, so I think for a first attempt it worked out quite well!
For this post I will go through step by step on what I did and if you have any further tips then please let me know in the comments and we can shared our ideas!
Also if you decide to try out some tie-dye then please share your creations with me on my Google + (link is in the side bar) I would love to see what you've done!
So Lets get to it...
First of all I set out my tie-dye area, I did mine outside because it saved the risked of staining the floors and it was such a lovely day!
 |
| This is what I used to tie-dye. You can buy this in many craft shops and there is usually a variety of colours to choose from. I got mine form 'Hobby Craft'. |
Above shows the equipment I used to help me tie-dye. I used a small plastic box and a cupcake cooling tray to create my tie-dye station (this worked just as well as a professional tie-dying station!).
You will also need:
- Your desired items to tie-dye (preferably 100% cotton) (I used two t-shirts, a vest top, and four small squares of cotton sheets)
- Your chosen tie-dye colour/colours
- rubber bands
- plastic gloves (the dye stains a lot! Trust me, I learnt the hard way!)
- Wear old clothes that you don't care about getting covered in dye
- Cling film or air tight plastic bags (you will have to put your tie-dyed item into this for the dye to saturate over night)
- Possibly scissors to cut the rubber bands off at the end
- Somewhere to rinse the tie-dyed items with water
- A washing machine (or you could hand wash)
- A small amount of detergent
I was super excited to try out this fire tie-dye! I was inspired my this YouTube tutorial https://www.youtube.com/watch?v=NafkWOJIWyY and I wanted to see if I could do it too.
This tie-dye uses no rubber bands, all you do is roll your chosen item up (in my case it was a vest top) and then tie it in a knot. The tutorial I linked above shows how to do this. Make sure the item you are tie-dying is damp.
The colours you will need are:
- red
- orange
- yellow
- black
(When I was buying the dyes I couldn't find any orange but I improvised by just using red, yellow, and black and I think it still looked pretty great in the end!)
 |
| Here are the colours I used. |
 |
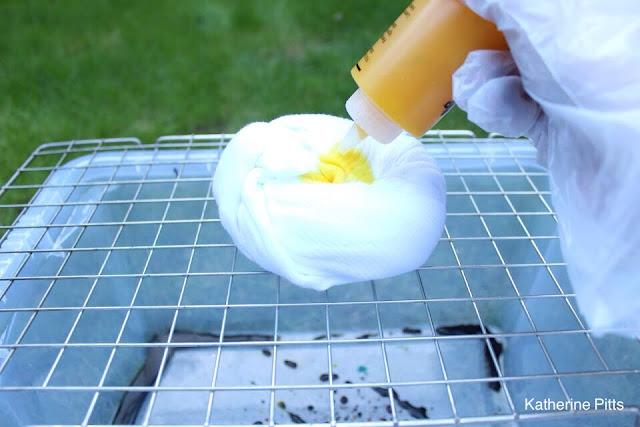
| First Dye the centre in yellow and work outwards. Don't be afraid to put loads on, the more the merrier I say! |
 |
| I then covered the edges in red and tried to go over some of the yellow to make up for the fact I didn't have an orange. If you have orange you can put this on before putting on the red. |
 |
| Don't forget to do the other side as you go. |
Spiral Tie-Dye
I think this design is a classic for tie-dye! I was inspired for this design by this You Tube video https://www.youtube.com/watch?v=abjpy72Sf6U
You can use any and as many colours you like for this design! Be free and get creative!!
 |
| When you have finished swirling, it should look something like this. |
 |
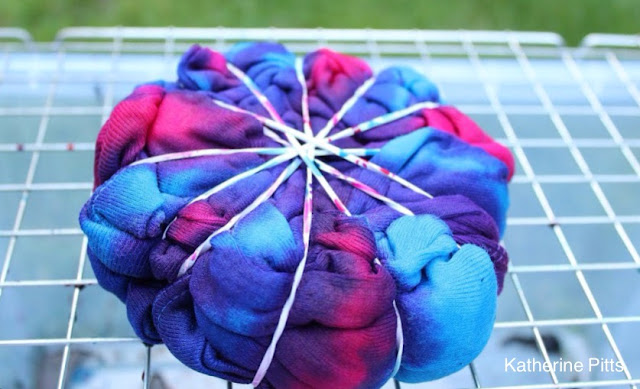
| I used the colours fuchsia and turquoise. |
 |
| I tried to stay in the lines of the rubber bands but the dye did spread. If you wanted to reduce this you could blot the excess die off with a cloth. |
 |
| I alternated the two dyes in each section. The colours bled into each other and made this beautiful purple! |
 |
| When I was done I had to take a few photos! I just thought it looked so pretty! Haha! |
 |
| Then wrap this in cling film or put it into a plastic bag over night or 6-8 hours. The longer you leave it the deeper the colour will be. |
For this tie-dye effect I also wanted to try dyeing a shirt that already had something printed on to it. The dye will not take to the printed area and I think that this makes the shirt look like I bought it like that. Haha, but no, now it is customized and is the only shirt in the world like it! Yaay!
For this Crumpled tie-dye effect I just decided to experiment a little. You don't have to use rubber bands for this effect but I did because I wanted more blank spaces in the design.
 |
| Make sure the shirt is damp and then randomly crumple up the shirt. It doesn't matter where you start on the shirt. |
 |
| It will look something like this when you are done. |
 |
| I then decided to cover the crumpled shirt in many rubber bands but you can skip this step if you want to. |
 |
| Like I said I covered it in many (and I mean many) rubber bands! |
 |
| I then randomly used all of my dye colours (red, turquoise, fuchsia, yellow and black) and shook the dye all over (don't forget to turn it over and do the other side). |
 |
| I thought it looked really pretty with all the colours! |
 |
| Then wrap this in cling film or put in a plastic bag and leave over night or for 6-8 hours. The longer you leave it, the bolder the colours will be. |
You can also try out some different, amazing tie-dye designs.
I recommend this You Tube channel I found, that really inspired me to try tie-dye for myself https://www.youtube.com/user/hobblephosk
 |
| This is a design inspired by the shape of an eye. I tried this out on a square sheet of 100% cotton. |
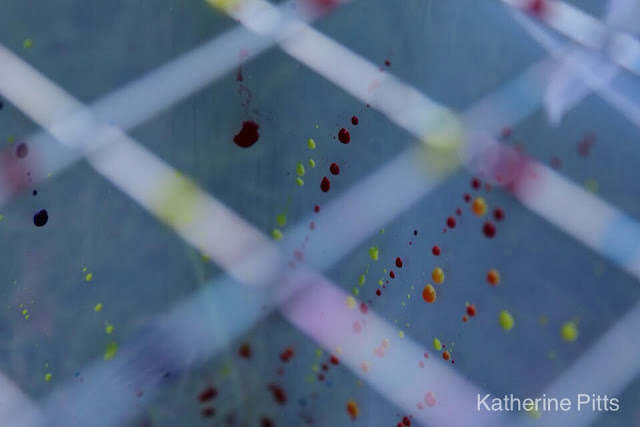
While I left the tie-dyed items to work their magic over night, I thought that the droplets of colour on the grid and box looked so pretty I had to take photos!
The camera I used is a Canon EOS 1200D DSLR. If you want to know more about it, feel free to check out my blog post on my first professional camera http://blank-kanvas.blogspot.co.uk/2015/08/my-first-professional-camera.html
You can scroll past this, if you're not bothered, to where I talk about rinsing and washing the tie-dye.
Hopefully this will inspire you to do some photography while you are waiting for the tie-dye! Let me know what you think!
 |
| I took a photo behind the box, of the light through the trees. I thought this looked quite abstract and interesting. |
Rinsing and washing
Once you have left your tie-dyed items for 6-8 hours or more (or overnight like me) then it's time to take them out and rinse them.
I rinsed mine in the bath but be careful because the dye will stain. However, I found that if I cleaned up straight away the stain went.
Rinse out your tie-dyed items until the water is almost clear.
 |
| This is rinsing out the fire tie-dye. |
 |
| The more dye you use the longer it will take to rinse out. |
Once you have rinsed out your tie-dyed items, squeeze out as much water from them as you can and then put them in the washing machine with a small amount of detergent.
I washed my t-shirts separately because it was my first time and I wasn't sure about colours running but I have heard that it is ok to put them all in together. Do what you feel comfortable with.
You can then iron them if you want to lock in the colour.
The finished product!
 |
| On the far left if the crumpled tie-dye on a printed shirt, in the middle is the fire tie-dye with no rubber bands, and on the far right is the classic spiral tie-dye. |
I am so pleased with how these turned out! Especially as this was my first attempt at tie-dye!
 |
| Here are some of the other tie-dye designs I tried on small square sheets of 100% cotton. |
So there you go! I hope you enjoyed this DIY tie-dye post as much as I did making it!
Thank you so much for reading! It means so much to me, you are the best!
If you have any questions or further ideas then please feel free to share them in the comments below and we can inspire each other!
Also if you make any tie-dye then please share it with me on my Google + https://plus.google.com/u/0/+KatherinePittsBlankKanvas/posts
Feel free to follow this creative adventure be told when I make a new post and check out my previous blog posts to hopefully be inspired to get creative!
Thank you so much for reading! Have a brilliant day!


